The first step of this week's tasks is to select and upload an image from week 4 lecture to my blog. I decided to choose a painting done by Gerhard Richter.
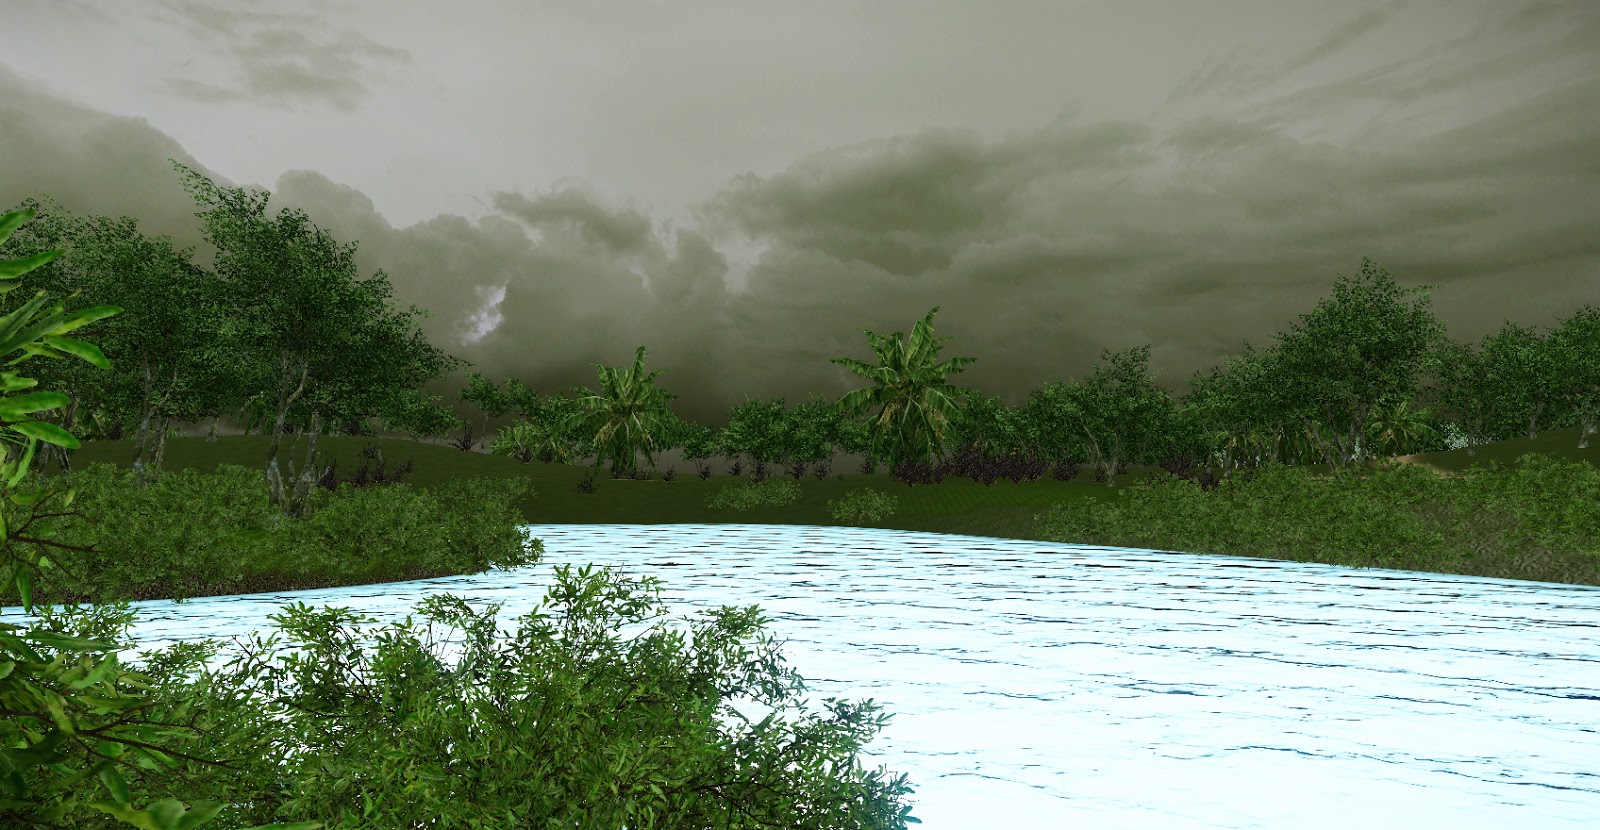
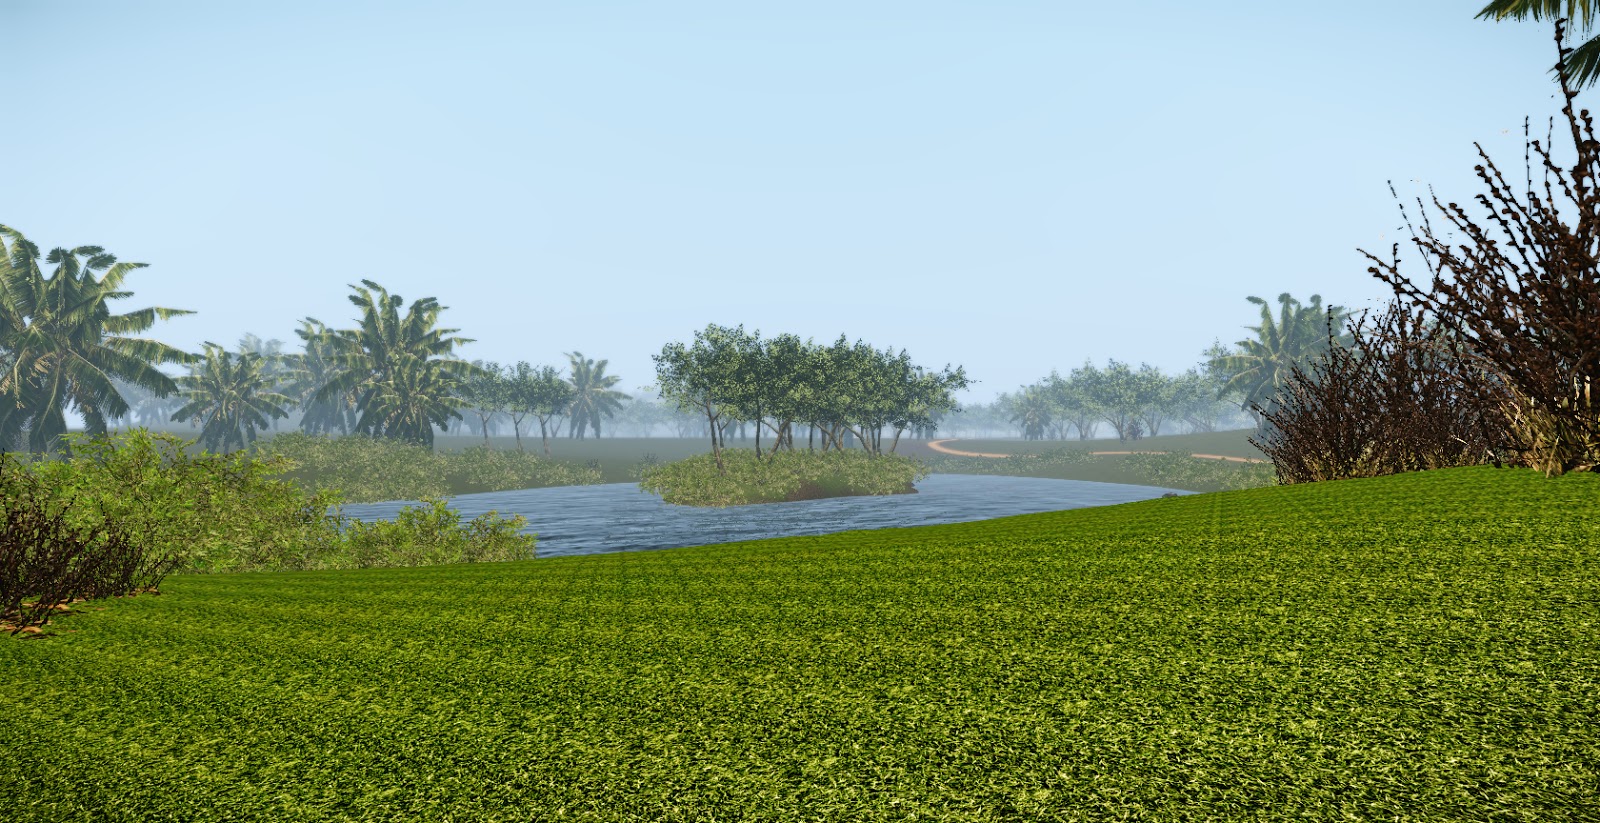
The next part was to replicate the mood in the chosen image on my own created island. I unfortunately was not able to start my island in cryengine so opted to creating a new island for this week's exercises. My results can be seen below.
Before
After
My screenshot of my current settings.
Time of day settings
Cloudy Sky
Settings for image above
Blue sky with some clouds
Settings for image above
Late afternoon cloudy day
Add caption
Settings for image above
Evening sky
Settings for image above
This week's lecture contained examples of environments both man made and those developed naturally over centuries. I believe that the main focus of this week's lecture was to actually inspire us to use reference images of naturally developed landscapes as inspiration to use in our own environment rather than using man made landscapes such as the palm island located in Dubai as our reference. I was also inspired by some of the works that various artists have produced.
The first task of this week's studies was to find 4 reference images of works created by a list of landscape architects / architects given to us in the lecture. I decided to select 1 image from each of the architects. The next step was to recreate similar scenes for each of these reference images in different areas of throughout my island keeping in mind that I has to use the brushes and objects found in cryengine to help me in recreating the features found in these reference images.
I decided to use the reference images as inspiration rather than blueprints to replicate the same landscape shown in the reference images. By doing so, I was able to recreate realistic landscapes with my own personal touch.
The task that followed was to select a 5th reference image and implement the landscape shown in a section of my environment. I decided to choose a reference image of a lion's forest as shown below to replicate in my environment using cryengine. The results can be viewed below.
The next part of this week's tasks was to create a short clip showing my environment which I have been modifying and detailing for my first experiment.
This week's lecture was about the topic of picturesque showing examples of the work produced by a few landscape architects and designers. Each of the work that was shown in this lecture was inspiring in terms of its context, form and especially the setting. Each of the landscapes shown were correctly set with relation to surrounding objects and elements. All in all this lecture has inspired me in the work that I produced as part of this week's exercises.
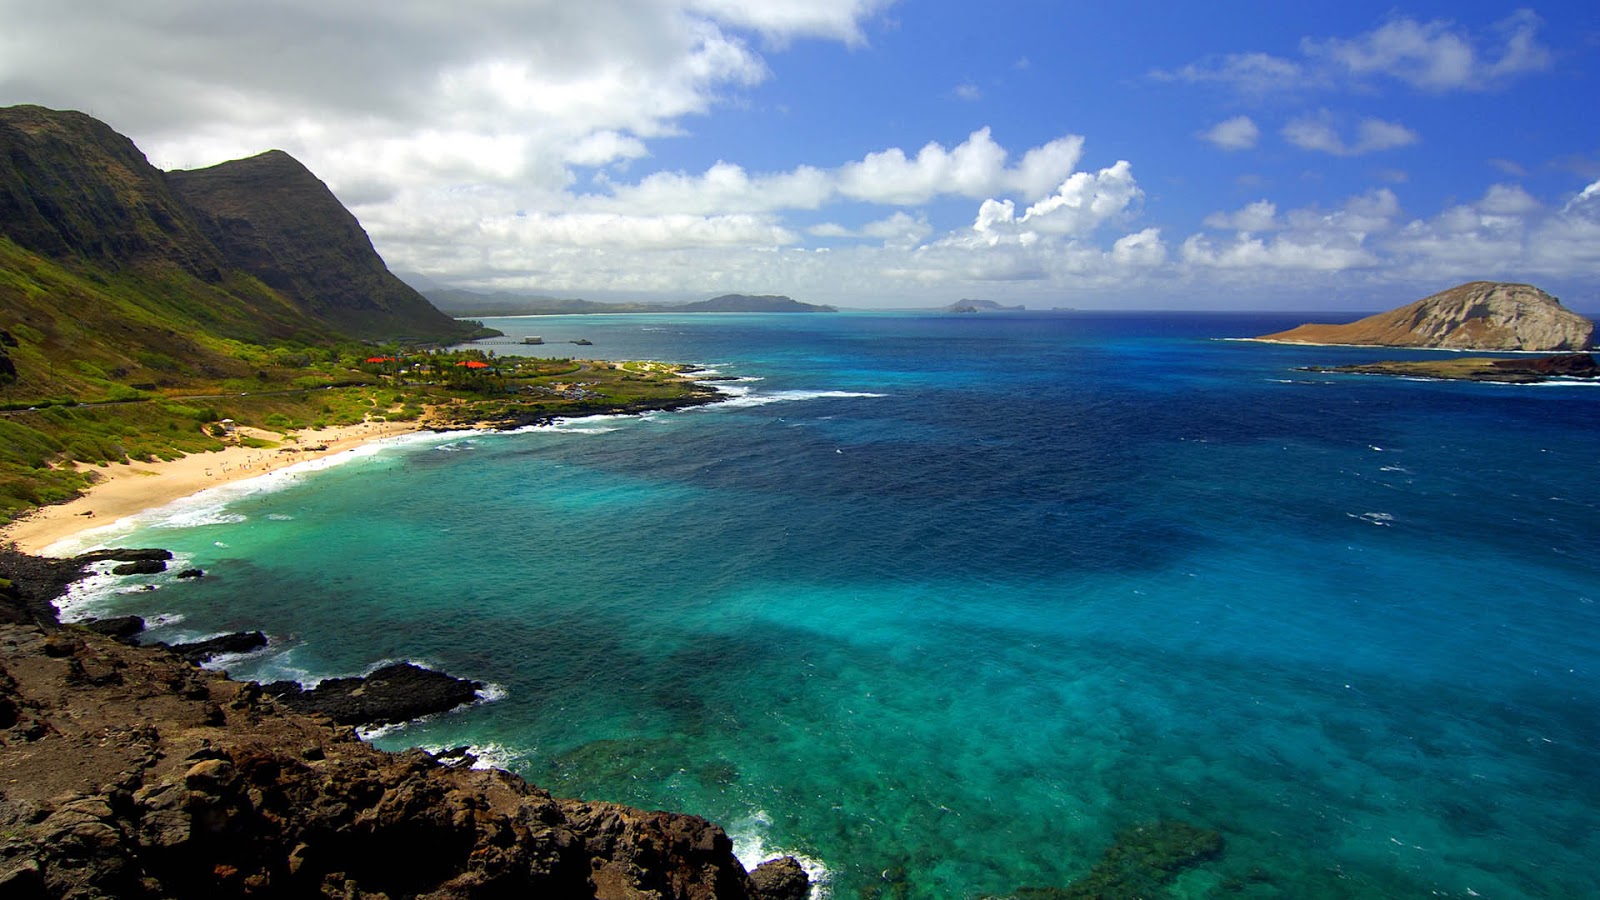
As part of this week's exercises we were instructed to find 5 images of different landscapes and to list the characteristics of the vegetation, terrain, lighting for each chosen landscape. The terrains that I have chosen have been placed below.
This particular image is of a coastal landscape that is made up of crystal clear water and harsh rocky terrains as well as patches of greenery and vegetation. The lighting in this particular landscape pierces through the water thus conveying sections of the vegetation beneath the water levels.
The following image conveys tall mountains spanning for large distances. The vegetation found in this landscape is dense in colour due to the shade provided by these towering mountains. The lighting in this landscape is broken into segments because of the large terrain and is also affected by the clouds that would form around these mountains.
The image above is of a snowy terrain that has formed as a result of freezing temperatures. The terrain is flat and does not have any height to it and the vegetation found on this terrain is large in size because only large vegetation would be able to survive the nature of this particular landscape. The lighting is rather strong and unobstructed which can be seen from long distances and on the horizon.
The image above conveys a harsh landscape that would only be found in a jungle environment. This terrain is made up of really dense vegetation providing very restricted access through it. The light in such environment is blocked and restricted by the dense vegetation so the sunlight cannot reach the jungle floor.
This particular landscape shown above is made up of soft sand that often forms sand dunes that can often be shifted into flat planes due to the wind. The profile of this landscape is every changing. The nature of this landscape does not support for the growth of vegetation and only one type of vegetation can be found on such terrain and that is palm trees. Clouds can hardly form in such a dry environment so the strong light generated by the sun dominates this environment
anthrocivitas, http://anthrocivitas.net/forum/showthread.php?t=11123, 06/08/2013 I decided to use the coastal beach landscape as reference to create my first island inside of cryengine. I began by generating my terrain and then adding the various materials such as sand, grass and rocks to add more detail to the scene. This scene surely requires much more detail but is a good foundation to begin creating my custom island for the first experiment.
Natural
Horizontal
Overwhelming
Dense
Distant
The next part of this week's tasks was to create another island based on another of the reference images that were gathered. Below is my desert terrain that I created using Geocontrol 2 and cryengine 3. I was really pleased with the outcome after becoming more familiar with cryengine and by watching tutorials.
The next part of this week's independent study was to create a custom texture using Photoshop. I decided to create a sand texture as I rely on this texture greatly in cryengine. I watched the tutorial by Helder and began making my own custom sand texture.
Above is my custom sand texture that I created using Photoshop. The last step for this week's tasks was to apply my created custom texture to my terrain that I created using cryengine. I was also really pleased with my created custom texture after I applied it to my terrain. The level of detail and quality of my texture really highlights the feel of the desert landscape. Below are a few close up screen captures of my terrain with my custom sand texture applied.
This week's lecture was mainly about the various types of artwork produced by different designers using different techniques and technology. I was really inspired by some of the work that was shown in this lecture and I particularly noticed how each of the artwork shown in this lecture was so detailed in expressing its purpose. This has inspired me to try and set a high standards for myself when adding detail to my environment. We were also introduced to GeoControl that enables one to generate various types of terrains to then be imported into cryengine. This program would be really useful in helping me start of with the first experiment.


