When I decayed my building, I made sure that I understood how the various elements of my building are constructed, the properties of the materials these elements are constructed from and how these elements will fail over time. For example, I knew that concrete would crack overtime due to being exposed to moisture. I combined my knowledge of such facts with my skills in using the software packages we were required to use to achieve the outcomes of this experiment which I'm overall pleased with,
Landscape Design
The landscape design in this experiment in my opinion is such an integral factor to consider to realistically replicate the feel of decay because a well maintained landscape will surely look different to a landscape that has not been serviced for 100 years so this was an important factor to consider when designing the landscape surrounding my decayed building.
Below I have placed a few images of my landscape to explain how unmaintained landscape can impact a structure after 100 years.
 |
| This image shows how part of the roof has been damaged due to rough weather conditions that the structure would have been through and how that has allowed for trees to encroach through the building and also how moisture has damaged the internal walls. |
 |
| This particular image shows how the surrounding bush and trees have encroached onto the building and have almost become part of the building and how vegetation and structure have almost moulded. |
 |
| This is a distant view showing the entrance to the house. It shows how the vegetation has blocked the main path which would have been clear of vegetation if maintained and it also shows how the structure has been impacted by the environment throughout the 100 years. |
Forensic Architecture
I was extra careful in this part of the experiment because I wanted to realistically convey how the various elements in my building would fail over time. I conducted research on each of these elements by firstly understanding how they are constructed, the materials involved and examples of these elements and how they have decayed once exposed to the environment and weather conditions.
Below I have placed images of different areas of my building and how they have failed overtime.
 |
| This image shows how the timber floor has faded overtime and how it has been affected by termites. |
 |
| This image shows how the roof has been damaged and a portion of it has fallen off. It also shows the main frame of the roof which has also decayed due to exposure to the elements. |
 |
| The main concrete walls of this house have also cracked and portions of these walls have fallen off. The face of these walls also show negative signs of human interactions after the original owners vanished from the earth through the use of graffiti. |
The Event
For this part I have shown great examples of human occupation by adding furniture to my model but taking care to convey human occupation after 100 years.
Below I have placed a few examples of human occupation in my building.
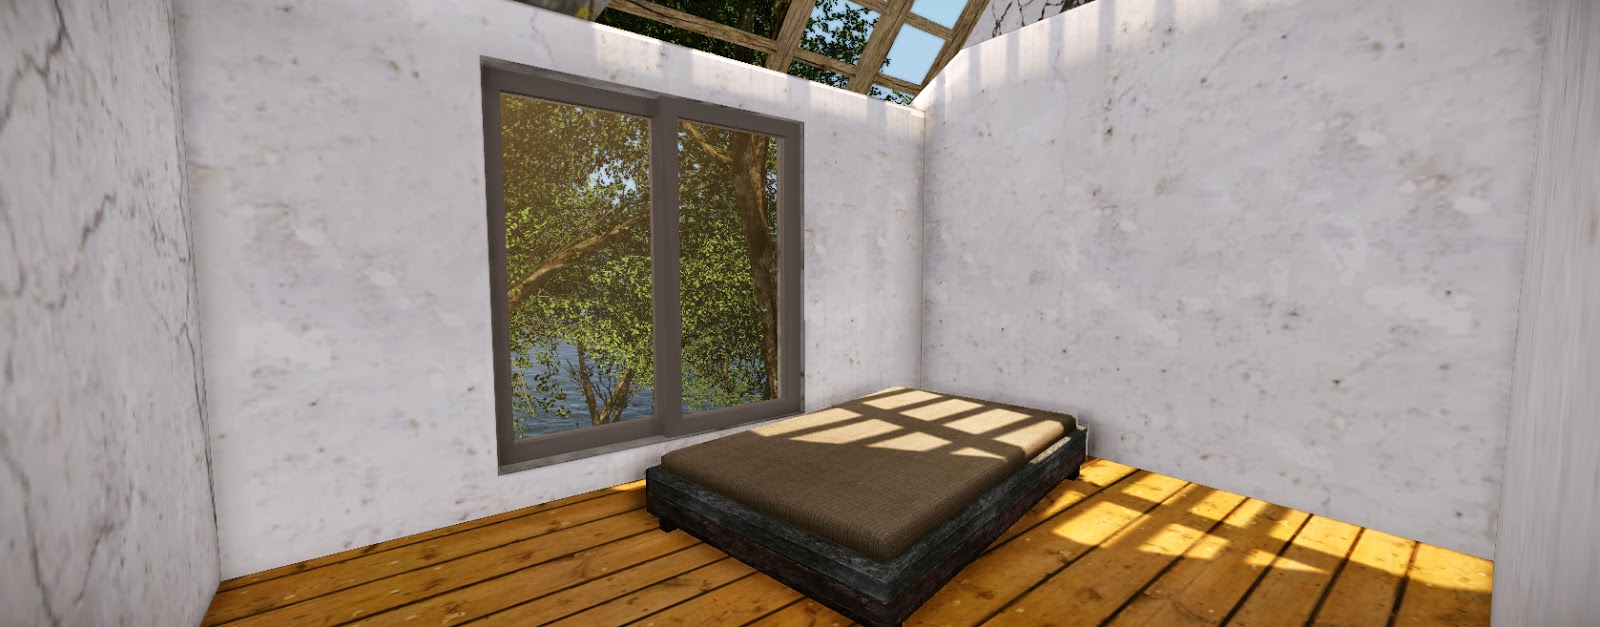 |
| This image shows an old bed in one of the bedrooms. I took extra caution when placing this bed because it would have initially been placed in the centre of the bedroom and in straight alignment due to the human nature. I have however shown it out of position and not as straight which could have been the result of an earthquake. |
 |
| This image shows an old dining table where the occupants of this house would have dined. Again, I have shown how this object looks after a natural disaster such as an earthquake by the placement and positioning of the chairs in relation to the table. |
The Textures
I believe that this was the most important part of the experiment as I have mentioned earlier. To realistically replicate the state of decay throughout my building and scene, I had to ensure that I created high quality textures that included high levels of details conveying the state of decay as per the element involved. For example, I added scratches & cracks to concrete, stains and colour fade to timber etc.
Below I have placed a few unwraps of the different elements of my building and the level of detail in each of these unwraps to replicate the state of decay.
 |
| Unwrap of external walls |
 |
| Unwrap of roof |
 |
| Unwrap of ground floor |
I added interactive decay to my project by mainly using the Rayfire plugin which can be seen throughout my trailer. I had to ensure that I understood the different properties of the materials that made up my building and how they would break based on the level of impact and the type of impact.
I also had to ensure that I accurately presented the state of decay throughout this part of the experiment.
My Trailer
The final part of this experiment was to create a short trailer which conveyed my building and the state of decay after 100 years of no human existence. I tried to capture the detail of the interactive decay in my trailer and also used my trailer as a tool to convey the message of what a structure would possibly look like and be like after 100 years of no human interactions.
Cryengine Files: https://www.dropbox.com/s/bx7q3d2mh15oyzi/BENV%202423%20Exp%202%20Aram%20Odesh%20z3464739.rar
3ds Max File: https://www.dropbox.com/s/0dyw27c7qlkxrkw/rudin_house_Aram%20Odesh_z3464739.rar
3ds Max File: https://www.dropbox.com/s/0dyw27c7qlkxrkw/rudin_house_Aram%20Odesh_z3464739.rar
No comments:
Post a Comment